A Simple Setup for Maximum Plants
So, you’ve just dropped hundreds of dollars on tubers – because some breeder (🙋) decided they were worth $50 each, or maybe you’re working with a few surviving unicorns from a tough season. Either way, you want to massively expand your dahlia army without suiting up and charging into the Dahlia Wars®. Good news: cuttings are your secret weapon. With about $200 - $300 in equipment, you can turn a handful of tubers into dozens, maybe even hundreds of extra plants.
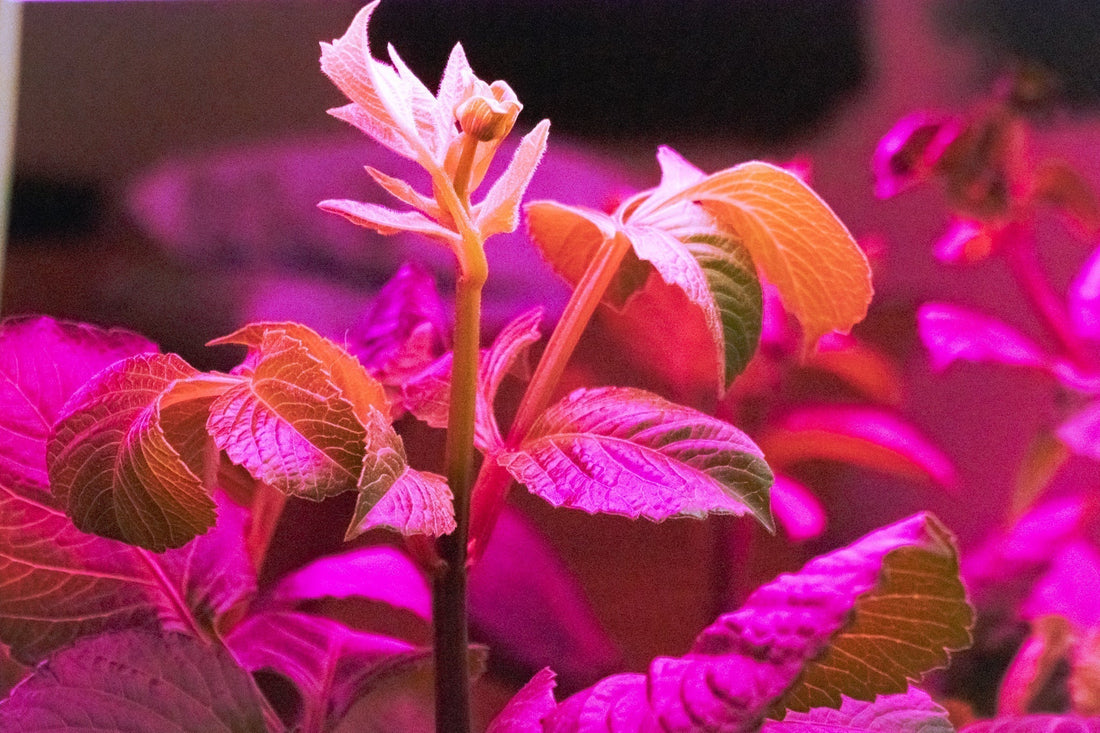
There’s something deeply satisfying about coaxing dahlias to life in the dead of winter. While the fields outside lie dormant, waiting for spring, I’m inside tending to trays of sprouting tubers, watching fresh green growth push up under the glow of grow lights. It’s a reminder that life doesn’t stop just because the calendar says so.

If winter starts wearing you down, a grow room like this is basically a therapy chamber. Fresh growth, warm humidity, and those bright lights – kind of like the light therapy boxes some of us relied on in Scotland to stay sane through endless gray days. Add a little birdsong or some good tunes on your smart speaker, and suddenly, you and your plants are in paradise.
The best part? It doesn’t take much – just a few simple supplies, a bit of space, and a little know-how. I’ll walk you through my method, using affordable, easily sourced equipment to make this as efficient (and fun) as possible. Whether you grab materials locally or order online, this setup will get you growing without breaking the bank.

Where to Buy Supplies
I get it that Amazon isn’t everyone’s warm cup of tea, and I’m not here to tell you where to shop. But I’ve linked everything to the cheapest and most effective versions of what I use, and if you have Prime with free shipping, these might be your best bet - as this is all about getting up and running for as low a cost as possible. Hate Amazon? You can still use the links to source equipment from other suppliers. Everything I’ve linked, I actually use, though I now source a lot of my gear from specialized nursery suppliers. Weed growers on Reddit and other online communities are another great source of info... probably, how would I know ;) Bottom line: don’t overpay when you’re starting out. Experiment, have fun, and find what works for you.
Also – full disclosure – I’m not affiliated with any of these Amazon links, I don’t make a dime off them, and this is just for your reference.
The Elephant in the Grow Room: Pesticides & Fungicides
Now, let’s get this out of the way: I use pesticides and fungicides in my grow room ☠️.
My farm? Completely free of them. But in a grow room, we’re not in Kansas anymore, Toto. There’s no delicate ecosystem keeping things in check. When fungus gnats, mildew, and other freeloaders arrive, you need preventative measures, or you’re going to curse the day you started down the path of indoor growing.
Everything I use is organically approved (like neem oil) or at least vaguely pretends to be (looking at you, Bonide Systemic Granules). For fungal issues, horticultural oils like those from Urban Gardener can be useful as a preventative. Mildew can be a real problem, especially if you’re using cuttings from last fall’s garden, and leaf spot creeps in when humidity gets too high. And don't forget the yellow sticky traps to help keep an eye on (and catch) unwelcome visitors. Below is a fungus gnat on a yellow sticky trap under the microscope.

The key? Scouting. Stay ahead of pests and disease by keeping a close eye on your plants and removing affected leaves immediately.
Taking the First Cuttings
Once your tubers have sprouted and your shoots reach about 3 to 5 inches tall, it’s time to start taking cuttings. Timing is key – you want strong, healthy shoots but not ones that have started developing hollow or woody stems.
Find a strong shoot with at least 2-3 leaf nodes. Using sterilized snips – go ahead and assume most of your dahlias carry virus – make a clean cut just above the tuber, at the base of the shoot or if you're feeling brave just pull the shoot off the tuber with a little wiggle and a snap. Remove the lower leaves, keeping just the top two sets. Some growers like to trim the top leaves in half – this reduces moisture loss and keeps energy focused on root development.

Each cutting can be dipped into IBA or IAA rooting hormone before being placed into plug cells filled with a light, well-draining mix. Rooting hormone isn't essential and dahlias can root without additional auxins, however it does typically speed up the process and give stronger initial root production – IAA is the naturally occurring auxin in plants that promotes rooting, while IBA is a synthesized version that is more stable and faster acting, so you have some choices to consider and experiment with. The plug cells sit inside a small tote (without a lid) to keep them corralled together, and the tote sits inside a 1020 tray with just enough water to create humidity without water-logging the plugs.

Cuttings require high humidity for the first 5-7 days – this is where a humidity dome is useful. Full-spectrum or red spectrum grow lights should be placed a few inches above the dome to prevent stretching, and they need to be on a 16-hour cycle using a timer. A heat mat with a thermostat keeps the root zone between 70-75°F, ensuring rapid root formation. Red spectrum light promotes rooting hormones in the plant and can speed up the process, but as an additional cost - it isn't really necessary when you're starting out and experimenting with your setup.

Under ideal conditions, cuttings should start forming roots within 7-14 days, but some can be more stubborn – patience is key and 20 days is still a win. Once roots emerge through the plug cells, they are transplanted into clear pots (so you can observe root development and moisture) filled with a well-draining potting mix. At this point, I dust the roots with mycorrhizal powder to help them establish stronger root networks. It's also a good idea to cut the lining of the plug cell as much as possible without disturbing the newly emerged roots - these cells are biodegradable, but it takes a lot longer to degrade than I'd like and we want our roots and tubers to grow unimpeded.
Maximizing Growth: Pruning & Taking More Cuttings
After about three weeks in clear pots, the first cuttings will be ready to take more cuttings from their side shoots. Wait for strong lateral growth, and then take new cuttings from the side shoots following the same method as before. Be sure to check for strong root growth and if it's getting too crowded in there, bump it up to a larger pot if needed.
Pinch the top at 3-4 leaf sets to encourage more stems. Each secondary shoot can be rooted as a new cutting. With this method, a single tuber can produce 10-20 plants per season.
Using Timers & Mylar for Efficiency
Automation is key in a controlled environment. I use timers for lights, fans, and heat mats to maintain consistency. Lights are set for a 16-hour cycle, fans provide intermittent airflow reducing mildew potential while strengthening stems by adding taper, and heat mats keep roots warm.

The fans I like to use are made for folks who like to build their own computers (PC fans). They're incredibly quiet, create just enough air movement across the plants and you can get packs of 3 fans for as little as $8 and power adapters for $15 that will run all 3 fans.
To maximize light efficiency, I attach Mylar sheets to the walls – this boosts light intensity by reflecting light back onto the plants. At around $5 for a roll, Mylar sheets are an affordable way to ensure your plants get the most light possible, reducing weak or uneven growth.

Equipment & Supplies
- Shelving for stacking trays
- Full-spectrum grow lights
- Timers
- Mylar sheets
- Heat mat with thermostat
- PC fans - improve air circulation and strengthen stems
- PC fan power supply
- IBA Rooting Hormone
Propagation Supplies
-
Sterilite shoebox-size tote boxes – Used to pre-sprout tubers in vermiculite.
- High-intensity rooting lights - Not essential, but useful if you're expanding your grow room.
- 1020 Seed trays – For sprouting tubers and bottom-watering cuttings.
-
Plug cells – Small, efficient for propagation.
- Heat mat with thermostat – Keeps roots at the ideal temperature for fast rooting.
- IBA Rooting Hormone – Helps cuttings form strong roots faster.
Growing On & Pest Prevention
- Balanced indoor fertilizer – Provides essential nutrients as plants grow.
- Mycorrhizal root treatment – Encourages stronger root networks.
- Neem oil spray – Organic pest control for aphids, mites, and whiteflies.
- Bonide Fungicide – Prevents fungal issues like mildew and leaf spot.
- Yellow sticky traps – Helps catch fungus gnats before they become a problem.
- Liba Electric Fly Trap – A backup solution for indoor pests.